
Quick Summary: Swordland Showdown is a bi-weekly Sunday PvP event where two alliances fight on a dedicated battlefield for one hour. Relic Points come from first-building captures, holding structures, Baggage Trains, Undercellars, and personal kills. Troops are only injured (no permanent losses). Alliance rewards follow Legion 1's win/loss, while personal rewards follow your Relic Point rank—so maximizing personal score often matters more than the alliance win alone.
Mastering the Kingshot Swordland Showdown is the fastest way to earn premium hero shards, gems, and exclusive gear materials in 2026. Whether you're a high-power garrison tank or a free-to-play support player, this complete PvP strategy guide breaks down the optimal troop deployments, hidden scoring mechanics, and phase-by-phase battle plans you need to secure top-tier rewards—even if your alliance loses the match.
Event Overview
| Detail | Info |
|---|---|
| Type | 2-alliance PvP (Legion vs Legion) |
| Eligibility | Top 20 alliances by Alliance Power (measured before Voting begins) |
| Schedule | Bi-weekly; battle always on Sunday |
| Pre-battle | Voting (2 days) → Registration (2 days) → Matchmaking (2 days) |
| Battle duration | 1 hour |
| Legion size | 30 combatants + 10 substitutes; up to 2 Legions per alliance |
| Troop losses | Injuries only; free full heal when you leave the battlefield |
| Scoring | Relic Points from buildings, Baggage Trains, Undercellars, and kills |
| Key rewards | Hero shards, gems, gear materials |
What Is Swordland Showdown?
Swordland Showdown is Kingshot's premier alliance-versus-alliance PvP event. Two alliances, each fielding a Legion of up to 30 combatants, compete on a special battlefield over one hour. The winner is whichever alliance accumulates more Relic Points (![]() ) — earned by capturing and holding buildings, looting dropped Baggage Trains, gathering from Undercellars, and defeating enemy troops.
) — earned by capturing and holding buildings, looting dropped Baggage Trains, gathering from Undercellars, and defeating enemy troops.
What sets it apart from other events:
- No permanent troop loss. All casualties are injuries that instantly heal when you leave the battlefield. Play aggressively.
- Two reward dimensions. You earn alliance rewards (based on Legion 1's win/loss) AND personal rewards (based on your individual Relic Point rank). These are independent.
- Hot take from experienced players: Your primary goal is not simply to win — it's to maximize personal Relic Points. Being a top scorer on the losing side pays better than being a bottom scorer on the winning side.
Eligibility & Format
Who Can Participate?
- Only the top 20 alliances by Alliance Power on the Alliance Power Leaderboard may enter. Power is measured before the Voting Phase begins.
- Each qualifying alliance registers up to two Legions. Each Legion holds 30 combatants + 10 substitutes.
- Substitutes can only enter if a registered combatant does not show up; they auto-fill open slots in the first 3 minutes (180 seconds) of the battle.
- Members cannot be in both legions. You can switch between legions until registration closes.
- You must be in the alliance before registration closes to participate.
- Pre-battle prep: Clear your infirmary. You cannot enter the battlefield with injured troops already waiting to be healed.
The Schedule
Swordland Showdown is a bi-weekly event that always occurs on Sunday. It runs through four sequential phases:
| Phase | Duration | What Happens |
|---|---|---|
| Voting | 2 days | Members vote on preferred battle times |
| Registration | 2 days | R4/R5 officers assign combatants and substitutes |
| Matchmaking | 2 days | System matches legions by opponent power |
| Battle | 1 hour | The actual PvP event |
Matchmaking — How It Actually Works
Matchmaking Mechanic: Alliances are matched based on the total Squad Power of their top 20 Governors among both the combatants and substitutes.
Squad Power is derived from governor gear, hero gear, and Battle Tech — not troop count alone.
This has a strategic implication: if you register only 15 strong players, your total squad power may be lower than a full 30-person roster, potentially landing you against a weaker opponent. Experienced players call this "sandbagging."
Important Note: Unequipping hero gear to lower your power does not trick the matchmaking system.
Scoring System: The Four Ways to Earn Points
Understanding the scoring system is the single most important thing you can do before entering the battlefield.
1. First Control Bonus
The first alliance to fully occupy a building after its capture timer completes earns a large one-time bonus of both Alliance and Personal Relic Points.
- First capture of the Swordshrine alone is worth 9,000 Alliance Relic Points (and 4,500 Personal Relic Points).
- Spreading out to claim first control on as many buildings as possible is highly incentivized. Capturing first control on all Phase 1 buildings yields exactly 26,400 Relic Points in the opening minutes — a significant early lead.
2. Ongoing Occupation
Points floating above a building. This 50% banked points UI element makes it instantly clear what "banked points" look like and why buildings become high-value targets.
Each building you control generates a continuous stream of points per minute:
- Swordshrine: 1,800 Alliance Points / min (900 Personal)
- Sanctums: 1,200 Alliance Points / min (600 Personal)
- Abbeys: 600 Alliance Points / min (300 Personal)
- Buff Buildings: 240 Alliance Points / min (120 Personal)
Important mechanic: 50% of your accumulated alliance points are "banked" visibly above the building. If you lose the building, those banked points drop as Baggage Trains on the ground and can be picked up by either side. This creates high-value targets and surprise point swings.
3. Baggage Trains (Loot Crates)
 Dropped crates on the world map when an attacker successfully flips a building.
When an alliance captures a building from the enemy, scattered loot crates called Baggage Trains appear around the building. Any player can send a march to collect them — they count toward both Alliance and Personal Relic Points. Individual crate values are randomized, but the total grows with the amount of banked points above the building.
This is a crucial secondary income stream. Looting is not passive — you need to actively send marches to collect Baggage Trains the moment a building changes hands.
4. Defeating Enemy Troops
Defeating enemies in combat earns Personal Relic Points only (not Alliance points):
- Attacker: 80 Personal Relic Points per 10,000 enemy soldier power defeated
- Defender: 40 Personal Relic Points per 10,000 enemy soldier power defeated
This scales dramatically with troop power in late-game kingdoms. Experienced players report being able to reach the personal point cap within the first few minutes purely through targeted combat in high-power environments.
5. Undercellars (Phase 3)
 Undercellars are unmarked gathering nodes that must be found using the magnifying glass.
In the final phases, unmarked gathering nodes called Undercellars spawn in roughly equidistant positions around the Swordshrine. You can find their exact locations by tapping the magnifying glass icon on the minimap. Send a march to gather from them like a resource node. They earn both Alliance and Personal Relic Points at a slower rate than buildings, but they are often ignored — making them a safe point source for support players and free-to-play members.
The Battlefield: Map & Phase Breakdown
 The official map overview showing the layout of the battlefield with the Blue and Red spawn zones drawn out.
Phase 1 — Opening (0–15 minutes)
Available from the start:
- 2 Sanctums (high point value, near center)
- 4 Abbeys (moderate point value)
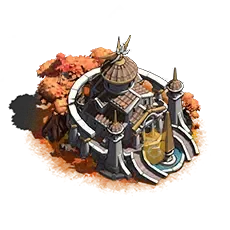
- Bell Tower (buff building: halves capture time)
- Royal Stables (buff building: halves teleport cooldown)
Phase 2 — Midgame (Exactly 15 minutes in)
 High-fidelity rendering of the central Swordshrine.
At exactly the 900-second (15-minute) mark, three additional structures become available:
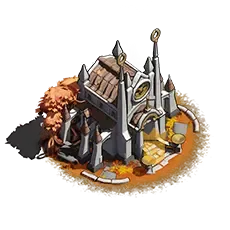
- Swordshrine (center, highest point value — the game's most contested objective)
- Hall of Reformation (buff: +15% attack AND -15% damage reduction for your alliance)
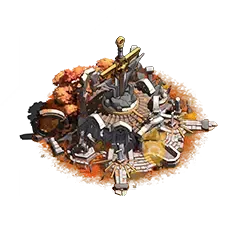
- Mercenary Camp (lets you send a mercenary strike against an enemy-held building)
Phase 3 — Late Game
Two waves of Undercellars spawn around the map at the exact timestamps of:
- 15 minutes (first wave)
- 20 minutes (second wave)
This phase becomes the endgame push: contested Swordshrine fights, last-minute building swaps, and Baggage Train races.
All 11 Structures at a Glance
| Building | Type | Effect | Icon |
|---|---|---|---|
| Swordshrine | Points | Highest point generation; locked until Phase 2 | - |
| Sanctum (×2) | Points | Second-highest point generation | - |
| Abbey (×4) | Points | Moderate point generation | - |
| Bell Tower | Buff | Halves occupation capture time for your alliance (-50%) | |
| Royal Stables | Buff | Halves free teleport cooldown (-50%) | |
| Hall of Reformation | Buff | +15% Squad Damage / -15% Damage Taken | |
| Mercenary Camp | Buff/Attack | Send mercenary strike on enemy building |
Buff Buildings: Why They Matter More Than Their Points Suggest
New players see the low point values of Bell Tower, Royal Stables, Reformation, and Mercenary Camp and deprioritize them. This is a mistake.
Bell Tower is the highest-priority buff building in Phase 1. The capture timer for every building is halved when you hold it. Since every first-control bonus is massive, shaving capture time pays off immediately.
Royal Stables directly controls how many times your alliance can reposition during the hour. Reducing the 12-minute free Advanced Teleporter cooldown to 6 minutes means another opportunity to contest a building, respond to an attack, or escape a losing fight.
Hall of Reformation is transformative in Phase 2. A 15% increase to both attack and damage reduction simultaneously shifts almost every head-to-head troop clash. Capture this the moment it opens.
Mercenary Camp is the lowest individual priority (no personal combat points for its kills), but it functions as a free softening tool before a major rally. Use it in combination with an imminent push, not standalone.
Roles & Responsibilities
There are three core roles that determine success on the battlefield. Here's a breakdown:
Tank (Defender / Garrison Leader)
Job: Hold key outpost buildings, send reinforcements, lead defensive rallies.
What this looks like in practice: You garrison your main march in the Sanctum or Swordshrine. You send weaker secondary marches to reinforce allied buildings under pressure. You coordinate with another tank to cover nearby positions, and ideally you can anchor 2–3 locations without overextending.
Hero priorities for this role: Defense-oriented heroes with the latest generation widgets. Howard + Quinn is the classic combination — when paired together, they can cut incoming damage by up to 40%.
Attacker (Rally Leader)
Job: Capture buildings, burn enemy cities to force retreats, disrupt enemy garrisons.
What this looks like in practice: You teleport aggressively onto contested or weakly held buildings, start rallies, and move on once a defender arrives. You also actively burn enemy cities to force players out of buildings — a city under attack will teleport away from a garrison, weakening enemy positions.
Golden rule: Attackers capture and move on. Defenders hold and reinforce. Do not let your attackers sit in garrisons.
Support / Joiner
Job: Fill garrison slots to prevent enemy solos, collect Baggage Trains, gather Undercellars.
What this looks like in practice: You join rallies as a secondary march, reinforce buildings with a weaker march, and actively farm Baggage Trains when buildings change hands. For free-to-play or mid-tier players, this role allows meaningful contribution without overexposure.
Phase-by-Phase Strategy
Pre-Battle Preparation (Before the Hour Starts)
Attendance first. The single most impactful thing your alliance can do is ensure everyone who signed up actually shows up. A high-power player who doesn't attend inflates your matchmaking power rating without contributing.
Assign roles before the battle. Designate tanks, attackers, and supports explicitly. Use Discord voice chat for competitive legions.
Use the Castle Scheduler to pre-assign who owns each building window. Pre-decided role ownership prevents the "I thought someone else was handling that" failure mode.
Clear your infirmary. You cannot enter the battlefield with existing injured troops.
Phase 1: The Opening Scramble (0:00 – 15 min)
Priority order:
- Royal Stables — Capture this first. Halving teleport cooldown for your entire alliance immediately multiplies repositioning speed.
- Bell Tower — Halves capture time for every subsequent building.
- Sanctum — Start your point engine. Try to hold at least one, ideally both.
- Abbeys — Fill remaining march slots. More buildings = more first-control bonuses = a bigger early lead.
- City harassment — Your strongest players should simultaneously pressure enemy cities to force retreats.
Role execution during Phase 1:
Attackers seize buildings and immediately hand off to defenders. Defenders fill captured buildings with enough joiners to prevent enemy solos.
Safe zone usage: You can stay in your spawn zone and still send out marches. Low-tier players should launch marches from the safe zone, collect Baggage Trains remotely, and gather Undercellars without overexposing their cities.
Phase 2: The Midgame Shift (15 min onward)
When the center structures unlock, the entire dynamic of the battle changes.
Hall of Reformation — capture this immediately. The +15% attack and +15% damage reduction buff applies to all your troops in every subsequent fight.
Swordshrine strategy: The Swordshrine is not mandatory to win. Tunneling all resources into the Swordshrine while surrendering Sanctums and Abbeys is a losing strategy.
- If you can hold it: great. It's worth the first-control bonus and sustained income.
- If it's too contested: pivot to holding both Sanctums, Bell Tower, Reformation, and Abbeys.
Mercenary Camp: Use it as a pre-attack softener. Launch a mercenary strike at an enemy building, then immediately send your rally.
Phase 3: Late Game & Endgame (20 min onward)
Undercellars fully spawn. Assign support players and excess march slots to gather these. They're often unchallenged.
Last 5–10 minutes — the comeback window: If you're behind, this is when concentrated aggression pays off most. Enemy buildings with large banked point reserves are high-priority targets — flipping them drops massive Baggage Train clusters.
Healing & Troop Recovery
The Exit-to-Heal Method
Leaving the battlefield instantly heals all of your troops for free. You incur a 12-minute respawn cooldown before you can re-enter.
If you have hundreds of thousands of troops in the infirmary, spending 12 minutes healing externally and returning at full strength is frequently more valuable than fighting at reduced capacity.
Free Speedups & Teleporters
- You start with 5 rechargeable march speedups and can recharge up to a maximum of 30.
- A free Advanced Teleporter recharges every 12 minutes (cooldown reduced to 6 minutes if you hold Royal Stables).
Use these aggressively. They are free-to-play resources and hoarding them is a mistake.
Reward Maximization Strategy
The Two Reward Dimensions
Alliance Bracket: Determined by Legion 1's win/loss result. Personal Tier: Determined by your individual Personal Relic Point ranking within your alliance.
The key insight: Being in the top personal tier of the losing bracket pays better than being in the bottom personal tiers of the winning bracket. Always prioritize your personal score.
Reward Tiers Overview
| Placement | Alliance Rewards | Individual Rewards |
|---|---|---|
| Large hero shard chest + gems | All-win rewards + MVP bonus if highest scorer | |
| Participation rewards (still worthwhile) | Base rewards for all contributors | |
| — | Extra hero shard bonus on top of placement rewards | |
| — | Bonus material chest for highest damage dealt |
Scenario 1: Favorable Matchup (You're Winning Easily)
If victory is certain early, buildings may not change hands often, limiting Baggage Train spawns and combat.
Solutions:
- Coordinate to deliberately trade buildings back and forth with the opponent to spawn Baggage Trains.
- Communicate directly with the opposing alliance to arrange cooperative point farming.
- Teleport near their spawn to invite combat.
Scenario 2: Unfavorable Matchup (You're Getting Outmatched)
Alliance Relic Points no longer matter when you can't win. Switch entirely to personal point farming.
Guerilla tactics:
- Find isolated, weaker enemies on the map and teleport next to them.
- When stronger enemies teleport in to defend their ally, welcome the fight — defending still earns 40 personal points per 10,000 soldier power.
- Exit and re-enter after the 12-minute cooldown to repeat this cycle.
- Solo-cap poorly defended enemy buildings, then immediately send all free march slots to collect the spawning Baggage Trains.
Never stay passively in your safe zone. Zero personal points, zero contribution.